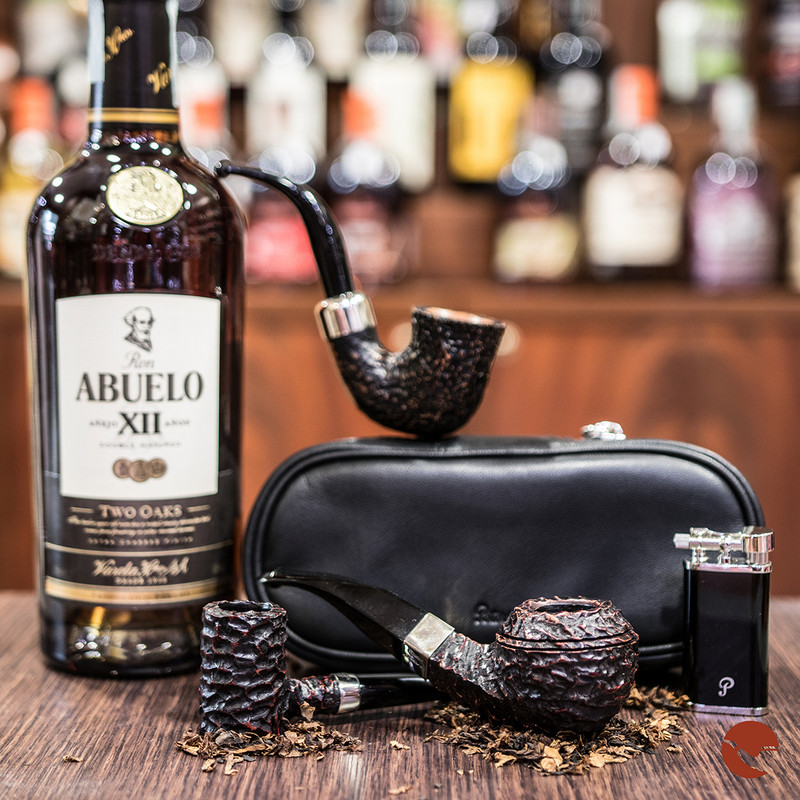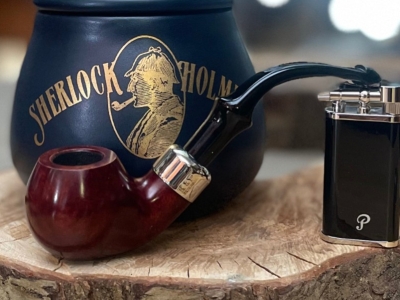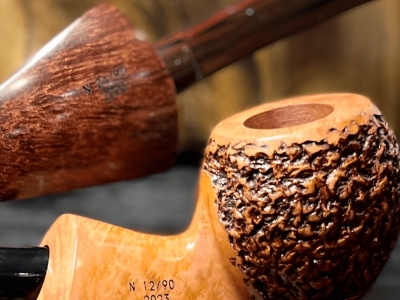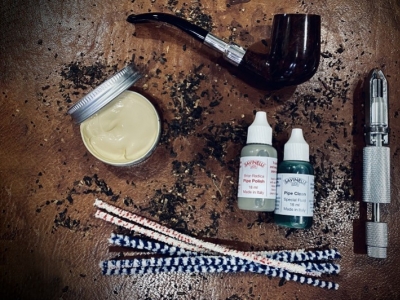
If you're here, you probably have a pipe in your hands and absolutely no idea how to smoke it. Or maybe you've already tried lighting it, without success. Either way, you couldn't have ended up in a better place: here you'll find a complete guide that has helped many people start smoking a pipe the right way.
At first glance, pipe smoking can seem complicated: preparing the tobacco, packing the bowl, lighting the pipe… all of these steps require a bit of practice. But don’t worry: if you read this guide carefully, what seems difficult at first will soon become simple and natural. With time, these gestures will become completely automatic.
Every passionate pipe smoker, myself included, had to learn how to truly understand and master the pipe. But I can assure you that what it gives back is priceless. Smoking a pipe for the first time is a bit like a first meeting: you begin to get to know it and, over time, discover whether that connection can turn into a great friendship.
And with dedication and passion, it might even become a lifelong love story.
How does a pipe really work?
To learn how to smoke a pipe, you first need to understand its philosophy: slow smoking, which has nothing to do with the fast, disposable experience of cigarettes.
Slow smoking, which includes both pipes and cigars, is called that precisely because it requires you to take a moment for yourself and dedicate it to a relaxing experience full of sensory nuances.
With cigarettes, smoking is immediate and often tied to satisfying a nervous impulse. A pipe, on the other hand, allows you to truly savor the tobacco. Just like a fine wine, pipe tobacco offers complex and layered aromatic characteristics that the pipe allows you to appreciate slowly.

This is also why pipe smoke is not inhaled: the goal is to taste the smoke between the palate and the nose, perceiving all of its aromatic nuances, something that would be impossible if it were inhaled like cigarette smoke.
Pipe smoking therefore requires active involvement from the smoker. Everything begins with choosing the tobacco blend that best suits your taste and preferred aromas, all the way to selecting the pipe itself, which can also influence the smoking experience to varying degrees.
It is a slow and reflective ritual, completely opposite to the frantic pace of modern life, because it asks you to stop for a moment. If today’s society constantly pushes you to be efficient and always in a hurry, the pipe invites you to slow down and enjoy a moment of calm.
And this is precisely one of the reasons why more and more people are rediscovering the pipe: they are looking for a ritual capable of restoring a more human and mindful relationship with time. At the same time, understanding when to smoke a pipe can also make a big difference in the way this experience is enjoyed.
What do you need to start smoking a pipe?
To start smoking a pipe, you obviously need two essential things first: a pipe and some pipe tobacco, which is very different from the tobacco used in cigarettes.
Pipe tobaccos are generally made from blends of different tobacco varieties that, when combined together, create a rich palette of aromatic nuances. And this is exactly one of the most fascinating aspects of slow smoking: every blend has its own aromatic characteristics that the smoker can learn to recognize and appreciate.
If you’re just getting started, the best advice is to experiment a little in order to understand which aromas and characteristics you prefer, because choosing a tobacco is, above all, a matter of personal taste.
We’ll go deeper into choosing the right pipe later on, but it’s important to know from the very beginning that there are also two or three essential accessories you’ll need in order to smoke a pipe properly.
The essential accessories for smoking a pipe
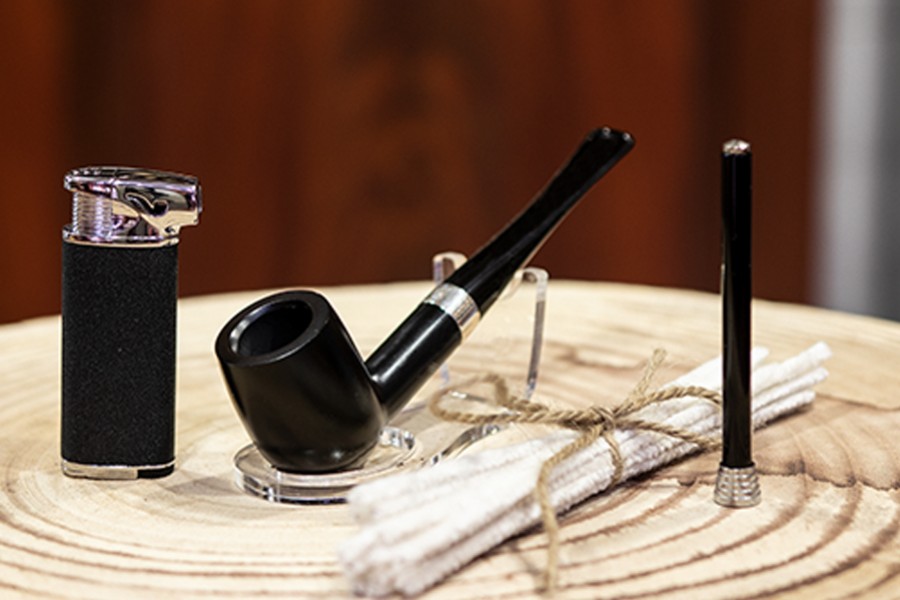
The truly essential accessories for smoking a pipe are basically three:
- Pipe tamper: a rounded tool, usually shaped like a nail head, that will become your greatest ally in keeping the pipe lit. You’ll use it before smoking to properly compress the tobacco inside the bowl and prevent the pipe from going out, but also during the smoke itself to gently press the tobacco and keep the combustion going evenly.
- Pipe cleaners: essential for cleaning the pipe after every smoke. Proper cleaning is fundamental to keeping the smoking experience pleasant and preventing the annoying formation of condensation, which can cause the pipe to go out repeatedly.
- Matches or a pipe lighter: these are used to achieve an even and easy ignition of the tobacco, a step that requires a bit more attention compared to lighting a regular cigarette.
Which pipe should you choose as a beginner?
When smoking a pipe for the first time, it’s perfectly normal not to have the ideal technique yet. Proper pipe smoking requires a slow, long, and gentle draw, which is very different from the way cigarettes are smoked. This is exactly why some pipe models are more beginner-friendly, as they make the first approach to slow smoking easier.
In general, the best pipe for beginners is a straight briar pipe, because it handles an irregular smoking rhythm better and is less likely to produce condensation. Beginners often approach the pipe the same way they would a cigarette, with stronger and more compulsive draws. This can lead to overheating, condensation, and the pipe constantly going out.
Of course, this doesn’t mean everyone has to follow the exact same path. In fact, I often say that “the pipe chooses the smoker, not the other way around.” We’ve met many smokers who fell in love with bent pipes and decided to start with them right away, which is why it can be helpful to understand the differences between straight and bent pipes. In these cases, all that’s needed is a bit more attention in maintaining a steady smoking rhythm.

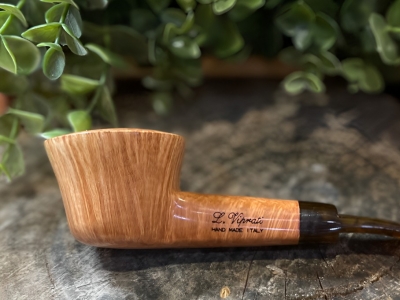
The most commonly recommended shape for beginners is usually the Billiard. Generally speaking, all straight pipe shapes are excellent starting points, as are Apple and Pot shapes. Semi-bent pipes can also work perfectly well for beginners. Full Bent pipes, on the other hand, being much more curved, usually require a bit more attention while smoking.
Another important factor is the length of the pipe. A medium-sized pipe is probably the most balanced choice for beginners. Very short pipes, such as Nosewarmers or Chubby models, tend to overheat more easily if you haven’t yet developed proper smoking technique. Longer pipes, on the contrary, usually provide a cooler and easier smoke, which is why understanding the differences between long and short pipes can be very useful.
Weight and wall thickness also make a difference. It’s generally better to avoid very small pipes or pipes with thin walls, since they accumulate heat more quickly. For beginners, a pipe weighing around 30 to 35 grams is often an excellent compromise.
As for the material, briar is without a doubt the best choice for beginners, thanks to its exceptional resistance to heat and combustion. It’s no coincidence that it is by far the most commonly used material in the pipe world. Alternatives such as corn cob and meerschaum pipes also exist, but it’s usually best to explore them later, once you’ve learned to properly manage a briar pipe.
That said, these suggestions should never be treated as absolute rules. Every smoker develops their own path and personal taste, which can differ greatly from traditional recommendations. The purpose of these tips is simply to make the first approach to pipe smoking easier, more enjoyable, and more satisfying from the very beginning.
The best pipe brands for beginners
To start smoking a pipe, there’s no need to spend huge amounts of money or immediately buy a particularly prestigious brand. There are many brands with an excellent quality-to-price ratio that are perfect for anyone approaching the world of pipes for the first time and looking for the right beginner pipe.
A higher price does not necessarily mean a better smoking experience. More often, it reflects the prestige a brand has built over time, its collectible value, or a more refined and distinctive aesthetic.
What truly matters is buying pipes made by recognized brands or skilled artisans, while avoiding extremely cheap products of questionable origin. In those cases, the risk is ending up with pipes made from poor-quality materials or even treated with potentially toxic finishes. The mouthpiece also deserves attention: materials such as acrylic and ebonite are the most widely used and reliable standards in the pipe world.
How to prepare a pipe before smoking
When getting ready to smoke a pipe for the first time, it’s a good idea to perform a quick preliminary check to make sure the airflow is completely clear. Simply pass a pipe cleaner through the mouthpiece and shank to ensure that the air passage is free from obstructions.
Once this is done, you can move on to the actual preparation of the smoke.
The first step is preparing the tobacco, which is essential for achieving proper combustion. This involves loosening the tobacco with your fingers, separating any clumped pieces and making the mixture more airy. During this phase, it’s also important to remove any unwanted elements, such as small stems or overly compact pieces. As you work the tobacco, it will naturally expand in volume and become lighter.
Pipe tobaccos come in different cuts, each with its own characteristics. Some are easier to manage, such as mixtures, while others require more attention because of their moisture content, as is the case with flakes.
In general, it’s best to avoid using a grinder when preparing pipe tobacco, since it tends to shred the mixture too finely, negatively affecting the quality of the burn.
Once the tobacco is prepared, it’s time to pack the pipe.

There are different methods for packing a bowl correctly, but the principle is always the same: the tobacco should be gently dropped into the bowl and then gradually compressed using your thumb against the rim of the bowl with a slight back-and-forth twisting motion. The lower part of the packing should remain softer, while the upper part can be slightly firmer.
After packing the pipe, it’s recommended to take a few draws on the unlit pipe to check the airflow. It should feel neither too tight nor too loose.
Both tobacco preparation and pipe packing are delicate stages of the smoking process, and this is exactly where beginners tend to make some of the most common mistakes when packing a pipe. One of the most frequent is compressing the tobacco too tightly inside the bowl, restricting airflow and making it difficult to achieve a steady and consistent burn.
How to light a pipe properly
To light a pipe properly, you’ll first need either a pipe lighter or a match.
A pipe lighter is preferable to a regular cigarette lighter because it features a 45-degree angled flame, which helps achieve a more even ignition of the bowl while reducing the risk of burning the rim. A standard cigarette lighter, on the other hand, has a straight flame that tends to focus heat on a single spot, increasing the risk of overheating the tobacco.
For the same reason, it’s important to avoid jet flame lighters. Their flame is much hotter and more aggressive, which can negatively affect the tobacco’s combustion and damage the pipe more easily.
Now let’s move on to the actual lighting process, one of the stages where beginners most commonly make mistakes.
The first time you pass the flame over the surface of the tobacco, you’ll notice that it begins to rise and expand. This is completely normal. At this stage, you simply need to gently tamp it down with the pipe tamper. Usually, one or two additional passes of the flame will be necessary before the pipe is fully lit.
You’ll know the combustion has started correctly when the tobacco burns evenly and you begin to get full and steady draws of smoke.
Once the pipe is lit, always remember to maintain a slow and regular smoking rhythm, avoiding draws that are too strong or pauses that are too long between puffs. Only in this way will the tobacco heat properly and release all of its aromatic nuances.
It’s also important to always keep the tamper close at hand. During the smoke, it will be essential for keeping the tobacco compact and maintaining a steady combustion.
How to smoke a pipe properly
Once the pipe is lit, the most important thing of all is maintaining the right smoking rhythm.
The most common mistake beginners make is smoking a pipe as if it were a cigarette. With cigarettes, people tend to take short but intense puffs. With a pipe, however, the principle is almost the exact opposite.
Pipe smoking should be slow, steady, and gentle. You should avoid drawing too forcefully, but at the same time your draws should be long enough, because only then will the tobacco burn at the proper temperature and release its full range of aromatic nuances.
The rhythm between draws is equally important: you shouldn’t wait too long between puffs, but you also shouldn’t smoke too quickly. The key is finding a steady cadence that keeps the combustion alive without overheating the tobacco. Learning how to maintain a smoother pipe smoking draw is one of the most important aspects of the entire experience.

This is where the tamper also becomes essential. When you notice the pipe is about to go out, the tamper becomes your best ally because it helps revive the combustion. All you need to do is apply gentle pressure to the tobacco in order to compact it slightly and encourage a more even burn.
If the pipe keeps going out frequently, it will be subjected to continuous temperature fluctuations. And this is exactly how the pipe smoker’s greatest enemy is created: condensation, also known as gurgling. Understanding how to prevent pipe gurgle is essential for achieving a dry, steady, and enjoyable smoke.
Gurgle is not saliva, but rather the liquid produced by the condensation of the smoke generated during tobacco combustion. Besides making the smoke bitter and unpleasant, it also makes it much harder to keep the pipe lit and relight it properly. Even the way you hold the pipe while smoking can influence the steadiness of the draw, an aspect that is often underestimated, especially by beginners.
How to smoke a corn cob pipe
The approach to smoking a corn cob pipe is not very different from that of a classic briar pipe, although there are a few small differences in the smoking experience and some additional considerations when managing the pipe.
Corn cob pipes tend to produce a slightly sweeter smoke, thanks to the natural aroma of the corn itself. For this reason, they are often paired with Virginia tobaccos to further enhance their sweet notes, or with fuller English Mixtures, which tend to tone down the corn aroma more noticeably.
It’s also important to debunk a very common myth: corn cob pipes do not necessarily have a short lifespan. If smoked properly and allowed to rest adequately between smokes, they can last surprisingly long, comparable to a briar pipe.
The most important thing is making sure the pipe is smoked only when it is completely dry. Smoking it while residual moisture is still present can cause the corn kernels to crack, permanently damaging the structure of the pipe.
It’s no coincidence that many smokers own at least one corn cob pipe in their collection, precisely because it offers a different smoking experience compared to a classic briar pipe, even when using the exact same tobacco. Their generally affordable price also makes them very easy to add to any pipe rotation.
The most common beginner mistakes
When approaching pipe smoking for the first time, making mistakes is completely normal. I can assure you that we’ve all been through it: myself included, as well as all those smokers who are now considered experienced pipe smokers.
Mistakes are part of the journey and, for this reason, they shouldn’t be faced with frustration, but rather understood and learned from. That’s how you truly begin to master the art of pipe smoking.
We can summarize the 5 most common beginner mistakes like this:
- Incorrect tobacco packing: one of the most common mistakes is using too little tobacco when packing the bowl. To understand whether the packing is correct, after pressing the tobacco down with your thumb, the tobacco level should sit roughly flush with the rim of the bowl.
- Not using the tamper during the smoke: the tamper isn’t only useful when the pipe is about to go out. Using it regularly during the smoke helps keep the burning tobacco compact, promoting a steadier and more even combustion. This also helps avoid taking overly strong draws to keep the pipe lit, reducing overheating and condensation.
- Incorrect smoking technique: this is especially common among former cigarette smokers, since they tend to keep a short and intense drawing style. Pipe smoking, instead, requires long, gentle, and regular draws. The way you hold the pipe in your mouth also matters: ideally, it should rest toward the side of the mouth rather than in the center, helping reduce the risk of tongue irritation or tongue bite.
- Not letting the pipe rest: after every smoke, it’s important to clean the pipe and let it cool down, but also to allow it to dry completely, especially if condensation has formed inside. A pipe that is still damp tends to produce a more bitter and less pleasant smoke. Generally, letting it rest for a day is enough for it to dry properly.
- Being too tense while smoking: this is perhaps the least technical and most psychological mistake. Many beginners approach the pipe with too much tension, almost afraid of making mistakes. In reality, small mistakes in packing or lighting rarely ruin the smoke completely. In fact, it’s precisely through these attempts that you learn to understand the pipe and truly enjoy it.
Pipe maintenance
To ensure that your pipe lasts over time and continues to provide pleasant and satisfying smokes, it’s important to take proper care of it. Pipe maintenance can generally be divided into routine maintenance and deep maintenance.
Routine maintenance consists of cleaning the pipe after every smoke.
Once the pipe has completely cooled down, empty the bowl by gently turning it upside down to remove the remaining ash. After that, you can disassemble the pipe and begin cleaning it with a pipe cleaner.
The pipe cleaner should be passed through both the mouthpiece and the shank in order to dry the internal airways and remove any residue or blockage. This step is essential to prevent unpleasant flavors, lingering aromas from the previous smoke, and the formation of gurgle inside the pipe.

Run the pipe cleaner back and forth through the airways until it comes out clean. The bowl should also be cleaned gently, removing any unburned tobacco fragments stuck to the inner walls.
Proper cleaning helps prevent many common problems: restricted airflow, overheating, bitter or unpleasant flavors, repeated relights caused by condensation, and a generally less enjoyable smoking experience.
As for deep maintenance, it mainly concerns the carbon layer that forms inside the bowl over time during regular use.
This layer, also known as cake, should not be removed completely. In fact, as long as it remains thin, it plays an important role by protecting the briar from burnouts, absorbing part of the moisture, and helping create a smoother and more consistent smoke.
The cake should only be reduced when it becomes too thick, generally beyond 1.5-2 millimeters. You’ll notice this because the smoke will start becoming irregular or the pipe will tend to overheat, since the internal diameter of the bowl gradually becomes narrower.
To reduce the cake properly, special reaming tools are used to bring it back to a thickness of around 1 millimeter. However, this is a delicate operation that requires care and attention, because removing too much cake too aggressively may crack the carbon layer or even damage the briar itself
How to smoke a pipe: tutorial
English subtitles available
Frequently asked questions (FAQ)
Why does my pipe keep going out?
A pipe can go out for several reasons, but in most cases the problem actually begins before the pipe is even lit. Tobacco preparation, packing, and the initial combustion are all essential for achieving a steady smoke.
Poorly prepared tobacco, packing the bowl too tightly or too loosely, an uneven first lighting, or passing the flame over the bowl only once can all compromise combustion. Generally speaking, a pipe usually requires at least two passes of the flame, alternating with the use of the tamper to gently compact the tobacco.
Smoking technique also plays a major role. During the initial lighting, the first draws should be slightly firmer, then become slower and gentler once the combustion stabilizes.
If the pipe goes out immediately, the issue is therefore most often related to tobacco preparation or bowl packing. In other words, what determines a good smoke usually happens before you even light the pipe.
Why don’t you inhale pipe smoke?
Pipe smoke is not inhaled because the purpose of pipe smoking is not to inhale the smoke, but to slowly savor it between the palate and the nose in order to appreciate all of its aromatic nuances.
In addition, pipe tobacco generally has a more alkaline pH than cigarette tobacco. If inhaled into the lungs, it would be much more irritating to the body.
With cigarettes, the situation is different: the smoke is inhaled because the experience is not focused on flavor appreciation, and the tobacco used, having a more acidic pH, is more tolerable when inhaled.
How long does a pipe smoke last?
The duration of a pipe smoke mainly depends on the size of the bowl and the smoking rhythm.
Some pipes have very small bowls and may provide smokes lasting only 10-15 minutes, while others, with much larger bowls, can easily last over an hour.
Smoking technique also has a significant impact: a slow and relaxed smoke will naturally last much longer than a fast and intense one.
How much does a good pipe cost?
You don’t need to spend huge amounts of money to buy a good pipe. Decent unbranded beginner pipes can already be found starting at around €40.
Branded pipes, on the other hand, generally start at around €65-70 and above. In these cases, besides the construction quality, part of the price also reflects the prestige of the brand, a more refined design, and greater attention to the pipe’s aesthetics
What are the best affordable pipe brands?
Among the best affordable pipe brands are Ropp, Talamona, Santambrogio, Savinelli, Vauen, Peterson, Brebbia, Chacom, and Opus Lubinski, with models generally ranging between €65 and €150.
These are all historic and well-recognized brands in the pipe world, backed by years of craftsmanship and capable of offering solid build quality even in their more affordable models.
What accessories do you really need to smoke a pipe?
To smoke a pipe properly, you really only need three essential accessories:
- Pipe lighter or matches, necessary for lighting the tobacco correctly;
- Tamper, useful for compacting the tobacco during the smoke and maintaining an even combustion;
- Pipe cleaners, essential for cleaning the pipe after every smoke and preventing unpleasant flavors or odors.
Using a pipe filter, on the other hand, is a very personal choice, because there are both advantages and disadvantages to using one. Some smokers use filters to soften particularly sweet or aromatic tobaccos, while many others prefer smoking without a filter in order to enjoy a more direct and authentic smoking experience.
Where can you buy a pipe online?
On Pipeonline you can find a wide selection of pipes, ranging from models with an excellent quality-to-price ratio to more luxurious and highly sought-after pipes for experienced enthusiasts.
The catalog includes numerous Italian and international brands, and shipping is available worldwide. In Italy, shipping is also free on orders over €75, with dispatch generally taking place within 24/48 hours after the order is placed.