How to light a Tobacco Pipe
Have you been given a tobacco pipe as a gift or recently purchased one?
If you've never happened to smoke it, you definitely need some small instructions on how to light the tobacco pipe, otherwise you risk complicating the lighting process or ruining your smoking experience.
But don't worry! It's just a matter of a few small tricks, which with habit become easy and straightforward to perform.
Preparing the tobacco pipe
Preparing the tobacco pipe is of paramount importance and essentially consists of loading it properly.
Without good tobacco pipe loading, you are unlikely to get a good smoke and, in all likelihood, you will struggle not a little with the draw.
In order to load the tobacco pipe, you must first prepare the tobacco by separating all the parts that have compacted due to moisture and removing the small elements that disturb the smoke (easily found in Kentucky-based tobaccos).
Once the tobacco has been prepared, we move on to the actual loading, which can be done in a variety of ways.
The most common method is to drop the prepared tobacco inside the stove and let it settle with small strokes on the stove, helping yourself with your fingers.
Then, you apply a little pressure to the tobacco, to insert more later.
At this point, you accompany the tobacco to the inside of the stove, using your thumb, resting on the edge of the tobacco pipe, so that you begin to press it in.
To tell if the tobacco pipe is properly loaded, try taking a few dry puffs to see how much air is coming in.
If the air is not getting through, I recommend emptying the stove and loading it again, using the pinecone; otherwise, if too much air gets through, keep pressing.
Lighting the tobacco pipe
The time has come to light the tobacco pipe!
As you can well imagine, you will need a lighter or a match.
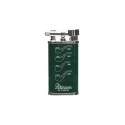
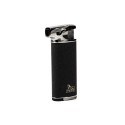
To light the tobacco pipe, it is preferable to use a soft-flame lighter, which has a 45° slant; the important thing is that it should be either a stone lighter or piezoelectric.
In the mode of ignition, there is no difference between those with stone and piezoelectric, only the duration changes: the stone lighter always lasts longer than the piezo lighter.
Passing the flame the first time, the tobacco inside the brazier will tend to rise, so it must be recompacted with the pinecone.
Another ignition is almost always necessary: on average, 2-3 passes of the lighter are sufficient before the tobacco pipe is lit.
You'll simply need to encourage even tobacco combustion, which will ensure full puffs.
As for jet-flame lighters, they are definitely not the best for the pipe, but today there are many cigar and pipe smokers who, for convenience, also use it to light their tobacco pipes.
With the right precautions, the jet-flame can be used for lighting the tobacco pipe, which in this case will not be direct: otherwise, you will end up burning tobacco!
It is preferable to light the tobacco pipe raw and then pull, continuing in this way until the tobacco pipe is finally lit.
If you intend to opt for matches, I recommend choosing longer ones, which contain less sulfur.
The mode of lighting, then, remains unchanged.
Keeping the tobacco pipe lit
To keep the tobacco pipe lit, your puffs should have a low intensity but a high frequency.
In this way, the brazier will be properly heated, also promoting the tasting of the tobacco's aromatic notes.
It is very likely that you will need the pinecone at this stage, so as to compact the tobacco in the brazier while smoking.
Avoid ash accumulation
Avoiding ash accumulation is very simple: halfway through the smoke, turn the stove downward to let it fall.
This way only the ash will fall, without affecting the brazier.


